You can now create or alter your party ledgers at the click of a button. With the help of the Fetch Details Using GSTIN/UIN button, you can instantly fetch the party details available on the GST portal and update it directly in the party ledger.
However, you also have the flexibility to create your party ledgers offline or manually, as per your business preferences.
The Fetch Details Using GSTIN/UIN feature will significantly save your time and effort, as you don’t have to manually type any of the details of the party, apart from the GSTIN/UIN at the beginning.
You won’t have to worry about the correctness or recency of the information, as it is being fetched in real time from the portal. You will be able to view and update all the available information about your party, starting from the name to the address details, such as state, area and pincode, and also the PAN.
1. Gateway of Tally > Create/Alter > Ledger.
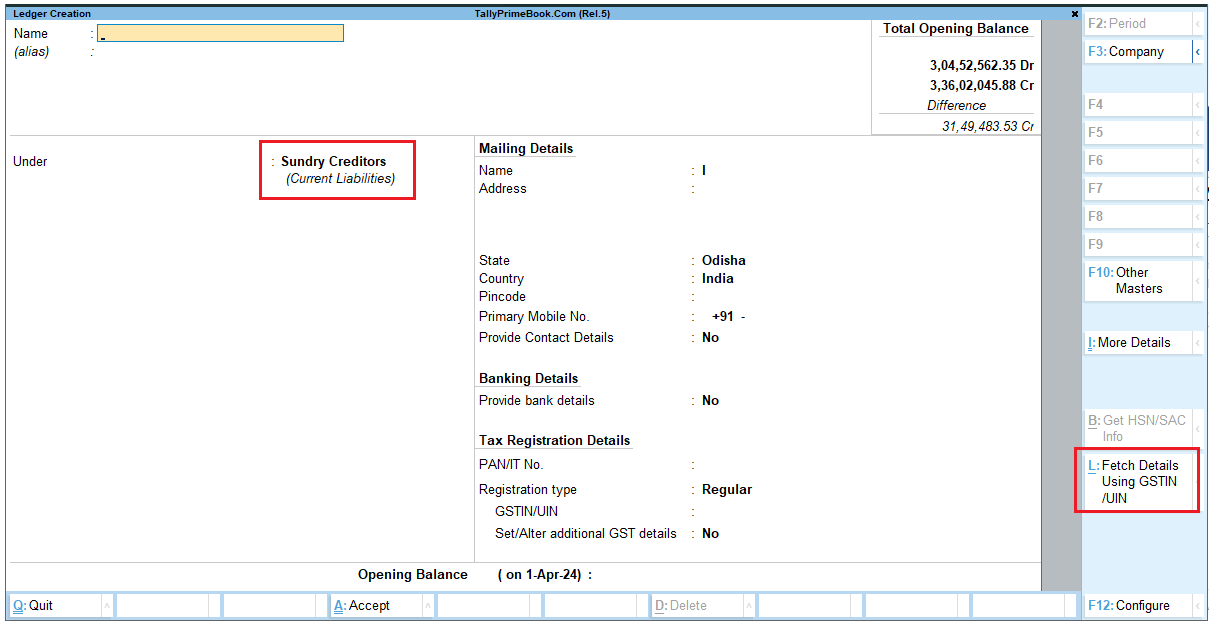
[1-New Updates in TallyPrime Release 5]
2. Press Alt+L (Fetch Details Using GSTIN/UIN).
3. Enter the GSTIN/UIN of the party.
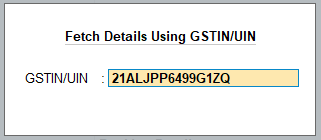
[2-New Updates in TallyPrime Release 5]
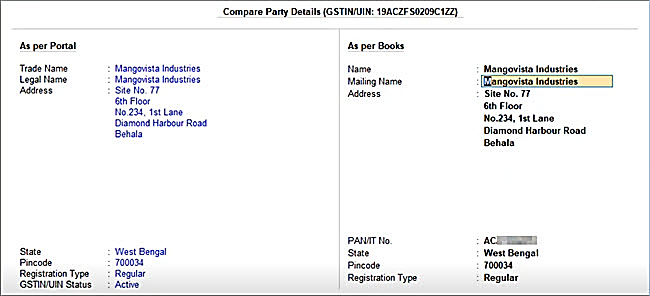
The Compare Party Details screen appears, where you can view the party details, such as address, PAN, and registration type & status, as available in real-time on the portal.
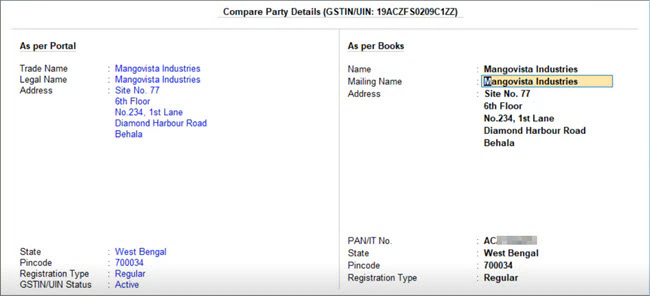
[3-New Updates in TallyPrime Release 5]
You can make any changes in the above details, if needed. For example, if the GST registration of the party was cancelled, then you can set the Registration Type as Unregistered/Consumer.
4. Press Alt+S (Filing History), if you want to view additional details about the party.
[See- Para-6.1]
5. Press Ctrl+A to save the details.
In the Ledger Creation/Alteration screen, you can see the fetched details are filled in the respective fields.
You only have to select the relevant group (such as Sundry Creditors/Debtors) and enter the phone number.
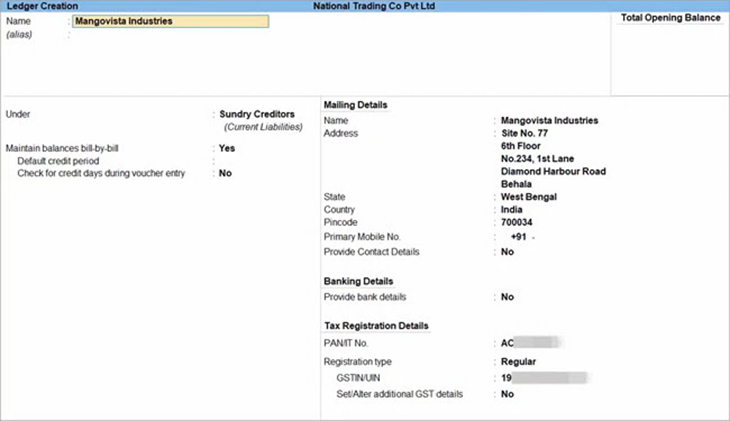
[4-New Updates in TallyPrime Release 5]
6. Press Ctrl+A to save the party ledger.
Similarly, you can update the details of an existing party by just entering the GSTIN/UIN and saving the fetched details.
You are all set to pass your transactions using this newly created or updated party.
1. View the Filing History of a Party Ledger
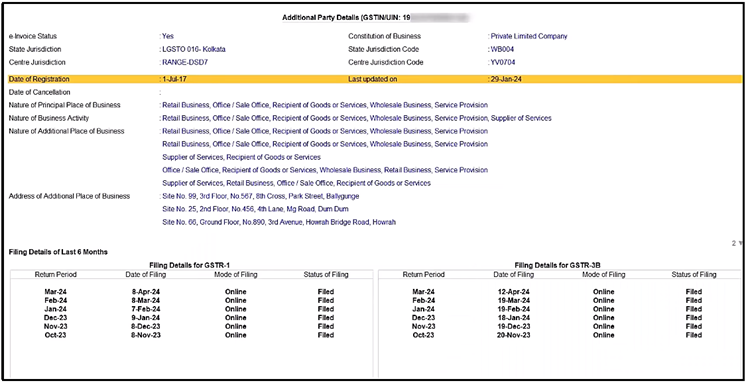
TallyPrime also provides you with the flexibility to view the filing details of the party, while creating or updating ledgers using GSTIN/UIN. You can view additional details of the party such as e-Invoice applicability, the jurisdiction, the nature of business, and any additional place of business.
Further, you can view the filing details of the last six months, which covers the Return Period as well the date, the mode and the status of return filing. The best part is that the filing details will be fetched based on the party’s registration type. For example, if the party is a Regular dealer, then you can see the filing details for GSTR-1 and GSTR-3B. On the other hand, if the party is a Composition dealer, then you can see the filing details for CMP-08.
In this way, the detailed information about the party will help you in taking key compliance and business decisions, and also foster better communication and understanding with other businesses in your network.
1. Gateway of Tally > Create/Alter > Ledger.
2. Press Alt+L (Fetch Details Using GSTIN/UIN).
3. Enter the GSTIN/UIN of the party.

[2-New Updates in TallyPrime Release 5]
4. In the Compare Party Details screen, press Alt+S (Filing History).
[6-New Updates in TallyPrime Release 5]
The Additional Party Details screen appears, where you can view the filing details of the party, such as e-Invoice applicability, the jurisdiction, the nature of business, and the filing details of the last six months.
[7-New Updates in TallyPrime Release 5]
In this way, you can refer to the detailed information about the party and take accurate business decisions.
