
e-Invoicing in TallyPrime is a delightfully smooth experience that will help you generate e-invoices for your business, in the course of your regular invoicing. Getting started with e-invoicing is also equally easy! You only have to create your e-invoice profile in IRP and then enable e-invoicing in TallyPrime.
If a taxpayer is not enrolled in the EWB portal, he or she can register on the e-invoice system. The taxpayer must have a GSTIN issued by the GST system as well as a mobile phone registered with the GST system. You can simply go to
and register for e-invoicing as shown below.
To get started with e-invoicing, you have to first register your business on IRP and then create an API user profile by selecting Tally India Pvt Ltd as your GSP.
In this section
- Register on IRP (Invoice Registration Portal)
- Create API User Profile
1. Register on IRP | IRP Registration
Note: First-time GSTIN can register by clicking on ‘Portal Login’ under ‘Registration’ in the top menu. The user is then led to the ‘e-invoice registration form’.
Step-1: Log in to the e-invoicing system
Open the IRP home page [https://einvoice1.gst.gov.in] , and
1. click Registration > Portal Login.
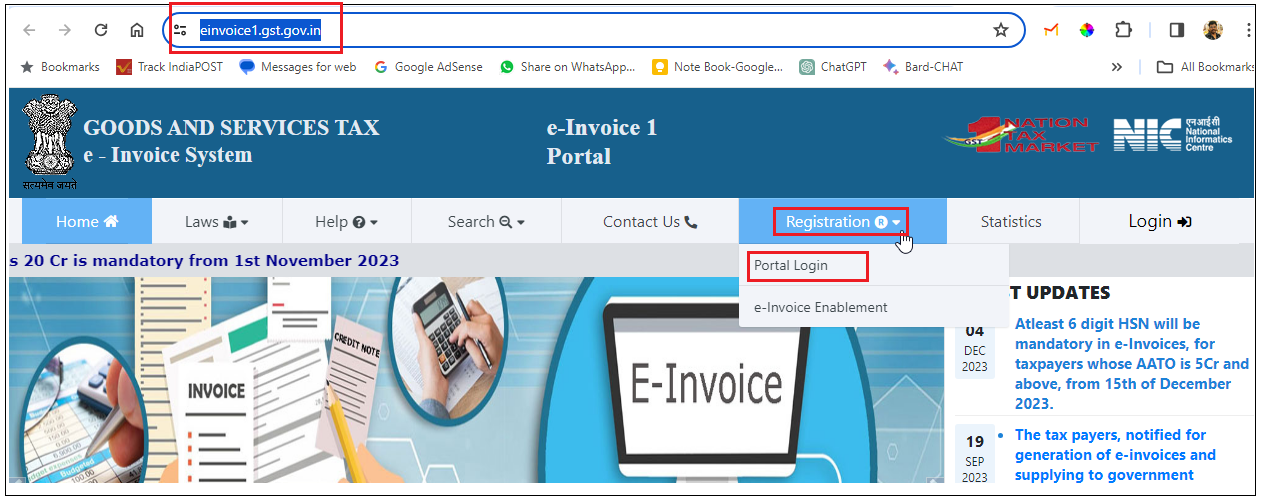
[Fig-1-e-Invoice Process in TallyPrime]
2. Enter the GSTIN of your business in the following e-Invoice Registration Form, followed by the CAPTCHA code, and click Go.
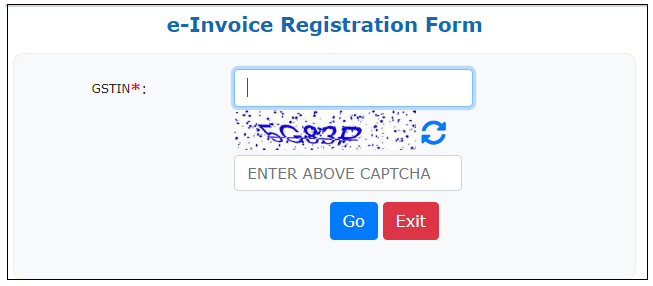
[Fig-2-e-Invoice Process in TallyPrime]
Note : If you are already registered, then you get this message in red colour regarding your already Registered PI
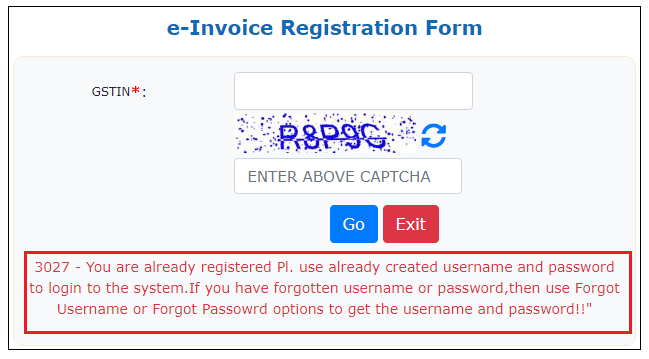
[Fig-3-e-Invoice Process in TallyPrime]
Step-2: e-invoice Enablement Form
1. click Registration > e-Invoice Enablement
The user must input their GSTIN and the presented captcha and click ‘Go’ to submit the request. Post submitting the request, the user will be taken to the e-Invoice Enablement Form.
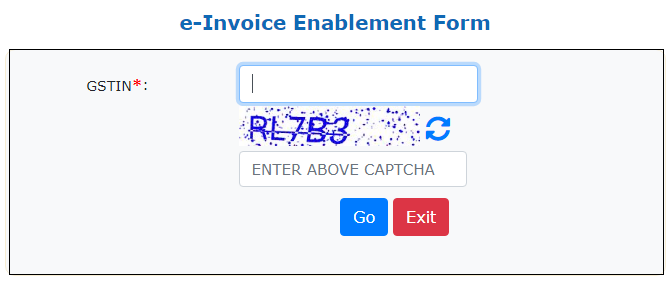
[Fig-4-e-Invoice Process in TallyPrime]
Step-3: Enter data on the e-Invoice Enablement Form
As per the entered GSTIN, the applicant’s information will be presented in the e-invoice registration form—the applicant’s name, trade name, mobile number, email address as they appear on the GST site, and so on. The user may confirm the information by clicking ‘Send OTP’ followed by getting the registration form verified.
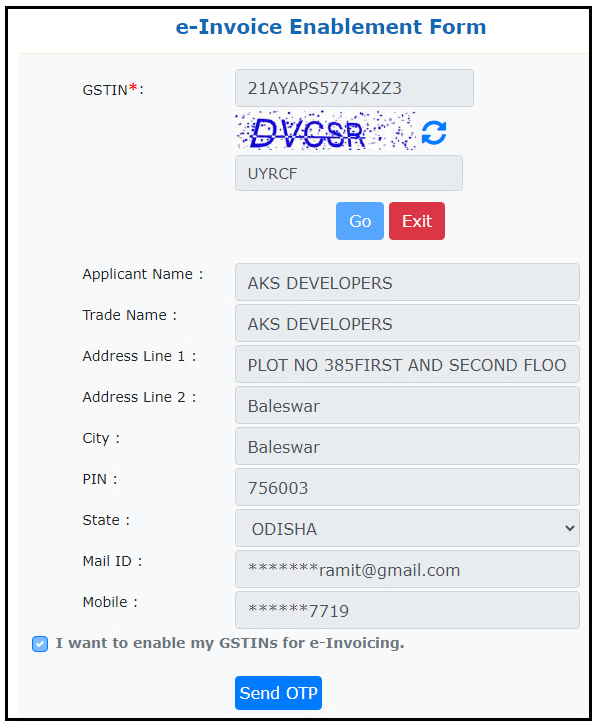
[Fig-5-e-Invoice Process in TallyPrime]
Upon the successful OTP verification, the user can simply set the ID and password for the portal for easier usage in future.
- Enter the code received on your registered mobile number, and click Verify OTP.
- After verifying the OTP, you will be asked to enter a username and password to create your login credentials.
- Confirm and save the details.
In case you forget the credentials, simply enter the GSTIN number and the registered mobile number under forget password/id, and you are good to go.
2. Create API User Profile
1. Open the IRP home page, and click Login.
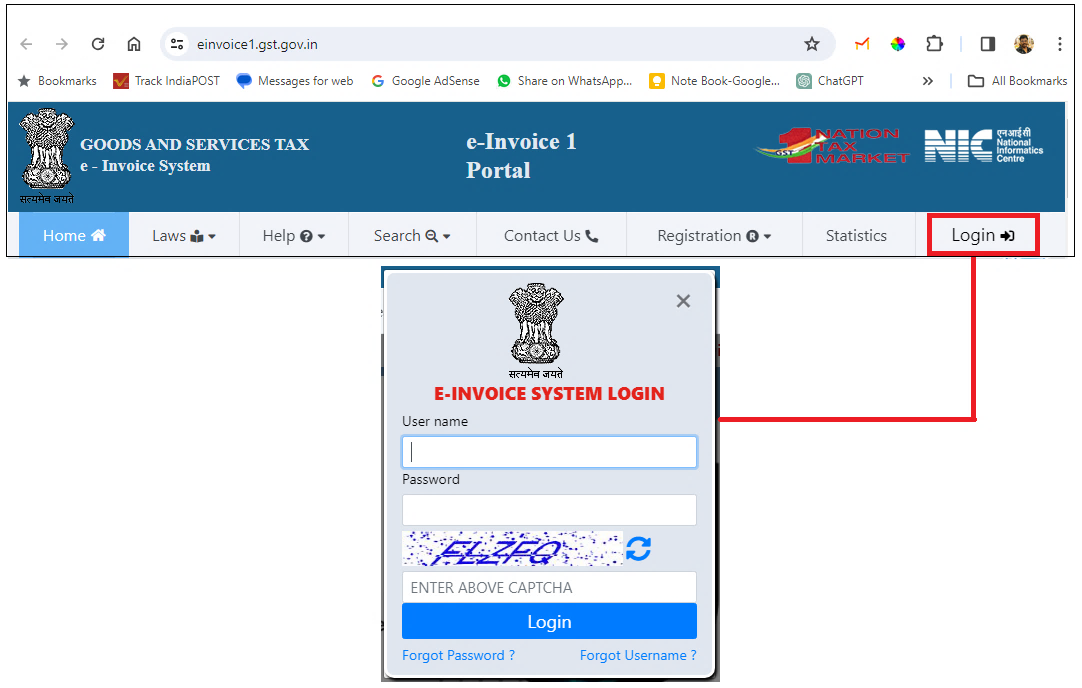
[Fig-6-e-Invoice Process in TallyPrime]
2. Log in with the username and password created while registering on IRP.
3. Click API Registration > User Credentials > Create API User.

[Fig-7-e-Invoice Process in TallyPrime]
4. Select Through GSP in the following API Registration screen:

[Fig-8-e-Invoice Process in TallyPrime]
5. Select Tally (India) Private Ltd in the Select your GSP field.

[Fig-9-e-Invoice Process in TallyPrime]
6. Specify the API username and password, and click Submit to save the details.
A user profile will be created with Tally (India) Private Ltd as the GSP.
3. e-Invoicing Setup in TallyPrime
To enjoy the benefits of e-invoicing in TallyPrime, you have to enable the e-invoicing facility in your company features. You can then configure the required e-invoicing options and easily generate the e-invoices as per your business needs.
1. Press F11 and set Enable Goods and Services (GST) to Yes. The GST Details screen opens.
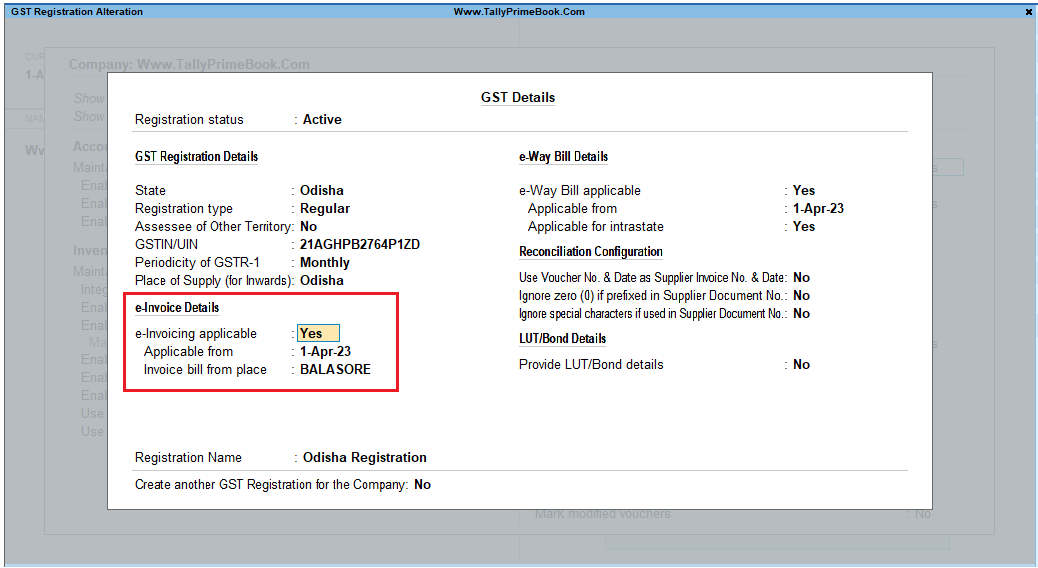
[Fig-10-e-Invoice Process in TallyPrime]
2. Set the option e-Invoicing applicable to Yes. The related options for e-invoicing will now be visible:
- Applicable from:
Set the date from which your transactions will be applicable for e-invoicing.
- Invoice bill from place:
Specify the location where your supplies are billed from, which can be the same location or different from where your supplies are shipped from.
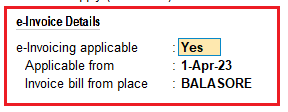
[Fig-11-e-Invoice Process in TallyPrime]
3. Press Ctrl+A to save the details.