
The e-Way Bill system was introduced by the government to simplify and streamline the process of GST compliance. An e-Way Bill document has to be carried while shipping the goods from one location to another. This document will carry the e-Way Bill number and other relevant details. Accordingly, TallyPrime is here with a smooth e-Way Bill experience for you and your business.
As a registered dealer, if you are shipping material worth more than Rs 50,000, then you have to generate an e-Way Bill from the portal by entering necessary information such as the details of the buyer, the quantity and HSN code of the goods, transporter ID, and so on. After you upload these details, an e-Way Bill number will be generated for this particular transaction. You have to print the e-Way Bill number and other details along with the invoice, and furnish them on the way, if needed. For example, an assessing officer might inspect the shipment, and might cross-check the e-Way Bill information with the goods being transported.
(A) Enable / Setup e-Way Bill
In TallyPrime, you can enter e-Way Bill details only when such transactions are recorded with stock items. The provision to enter e-Way Bill details is not available in accounting invoice mode, and in companies enabled to Maintain only accounts.
Step -1 :
- Open the company.
- Press F11 (Feature) > set Enable Goods and Services Tax (GST) as Yes.

[91-Sales Process in TallyPrime-3 & Higher]
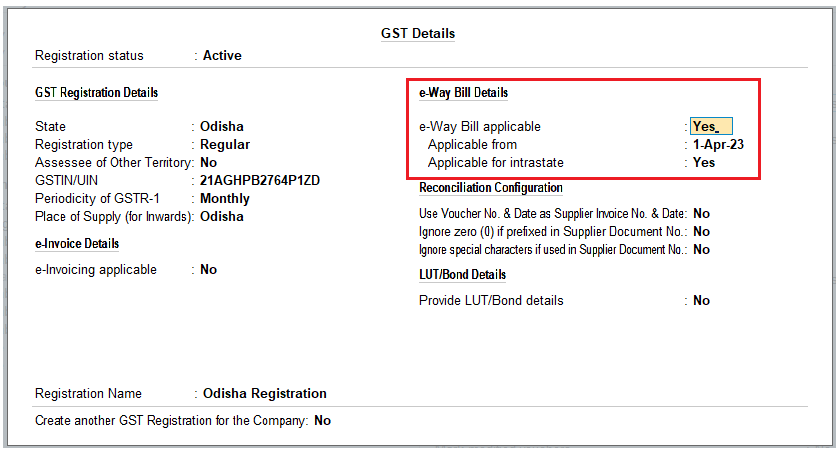
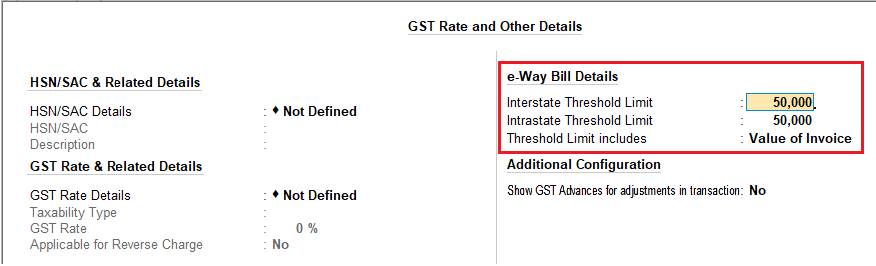
- In the Company GST Details screen, e-Way Bill options, including the applicable date and threshold limit, are provided.
[92-Sales Process in TallyPrime-3 & Higher]
[93-Sales Process in TallyPrime-3 & Higher]
You can change the settings as required. Based on the threshold limit entered, you can enter the details required for e-Way Bill in the invoices.
In the party ledger, if you have selected the Registration type as:
- Regular or Composition : The GSTIN/UIN is considered as the transporter ID.
(B) Generate Online e-Way Bill with Sales
You can easily generate an e-Way Bill while saving your invoice and also print the QR code and other details. If you want to generate your e-Way Bill details along with your e-invoice, then set the option Send e-Way Bill details with e-Invoice to Yes in your company (F11) features.
- Gateway of Tally > Vouchers > press F8 (Sales).
Alternatively, press Alt+G (Go To) > Create Voucher > press F8 (Sales).

[94-Sales Process in TallyPrime-3 & Higher]
- Select the party ledger, sales ledger, stock items, and tax ledgers. When the invoice value is ₹. 50,000 or more, the option Provide GST/e-Way Bill details? appears which is set to Yes . Press Enter to view the Statutory Details screen.

[95-Sales Process in TallyPrime-3 & Higher]
- In the Statutory Details screen, enter the mandatory details required for generating the e-Way Bill.
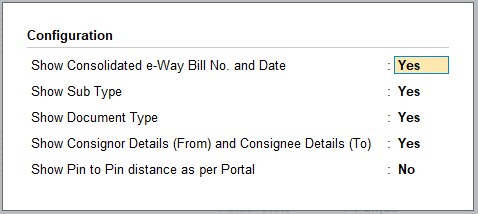
| Note : Click F12: Configure and enable the following options:
· Enable consolidated e-Way Bill & Date ? to enter the details required for generating a consolidated e-Way Bill. · Show State Name for Dispatch From and Ship To – select the State Name under Dispatch From and Ship To sections. · Show consignor details? to update your company address details.
[96-Sales Process in TallyPrime-3 & Higher] |
[97-Sales Process in TallyPrime-3 & Higher]
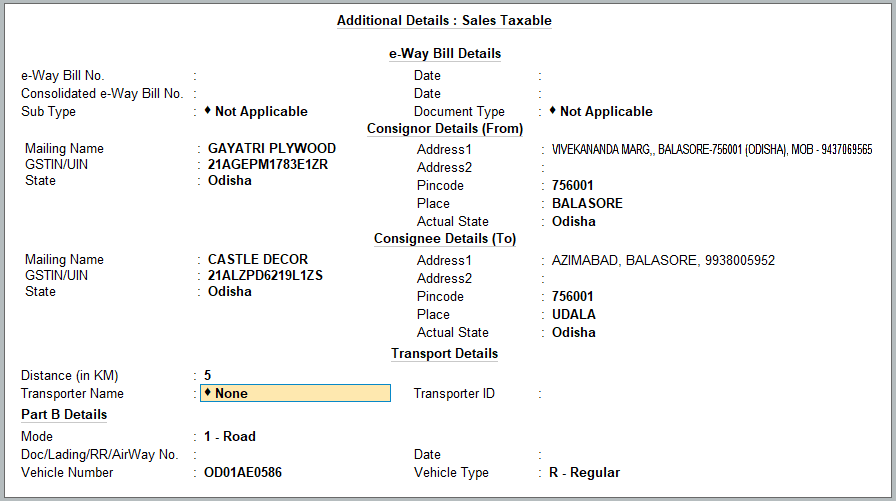
The e-Way Bill will be generated based on the details entered in this screen.
- Dispatch fromand Ship to: This will be prefilled based on the address provided in the Company and Party ledger, respectively. You can update this, if required.
- Distance (in Km): This is the distance between the addresses of the Consignor and Consignee. The validity of your e-Way Bill depends on the distance entered in this field. The next time you record a transaction for this party, the distance will be prefilled based on the address and PIN code entered in the Party ledger.
- Transporter Name: Select the Transporter Name. You can set it as None if you are transporting the goods using your own or hired vehicle, or if you are using a different mode of transport such as Rail, Air, or Ship.
- Transporter ID: Enter the Transporter IDprovided by the transporter.
If Part B Details are available, then you can enter the following details.
- Mode: Select the mode of transport, such as Road, Rail, Air, or Ship. You can also create a New Mode, if required.
- Vehicle Number: Specify the number of the vehicle used for transporting the goods.
- Vehicle Type: Specify the size of the vehicle, such as Regular, Over Dimensional Cargo, and so on. You can also create a New Vehicle Type, if required.
- Press Enter to proceed to the transaction
- As always , you can press Ctrl+A to Save.
A confirmation screen for e-Way Bill generation will appear.
Press Enter to proceed. The e-Way Bill Login screen will appear.
Enter your Username and Password.

[98-Sales Process in TallyPrime-3 & Higher]
You will remain logged in for the next six hours, provided you do not turn off the computer or reset your credentials.
- Press Enter. TallyPrime will start exchanging information with the e-Way Bill system.
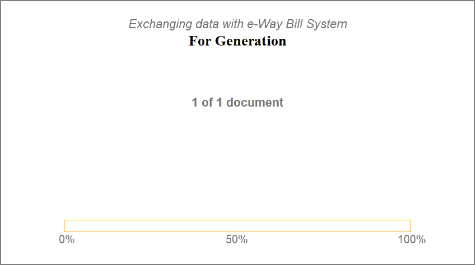
[99-Sales Process in TallyPrime-3 & Higher]
After the exchange of information, a confirmation message will appear.
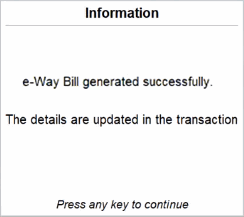
[100-Sales Process in TallyPrime-3 & Higher]
You can see a preview of the invoice.
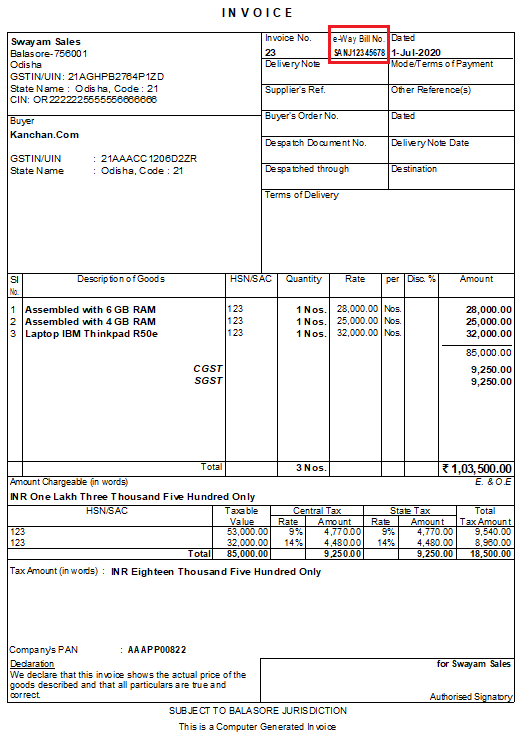
- Press Page Down to view the generated e-Way Bill with all the relevant details and QR Code.
The e-Way Bill No. and Validity Date will also get updated in the Additional Details screen. If you want to explore additional options for configuring your e-Way Bill, then you can press Ctrl+I (More Details) or F12 (Configure).
(C) Print the Sales Invoice with e-Way Bill Number
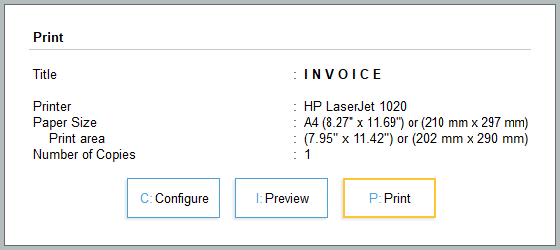
Go to alteration mode of the invoice and press Ctrl+P (Print).
[101-Sales Process in TallyPrime-3 & Higher]
In the Voucher Printing screen:
- Press C(Configure).
- Ensure the option Show e-Way Bill No. is set to Yes.
- Accept the Print Configurationscreen.
- Press Escand press P (Print) to print the invoice.
[101-A-Sales Process in TallyPrime-3 & Higher]