You can install TallyPrime on any computer with 64-bit edition of Microsoft Windows 7 or later.
1. Download the setup.exe file from : https://tallysolutions.com/download/
2. Select the folder where you want to save. Then double-click setup.exe to install TallyPrime.
1
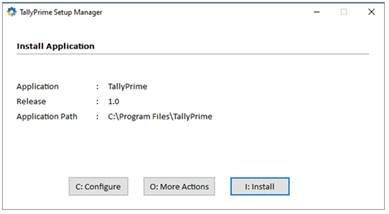
3. Configure Application Path, if needed.
- So double-click Application Path.
- Click … and change the path as needed.
- Close the List of Configurations window.
Note: If you are already using TallyPrime, it is recommended that you install TallyPrime in a different folder. This will allow you to use both the products simultaneously, if needed.
4. Click Install.
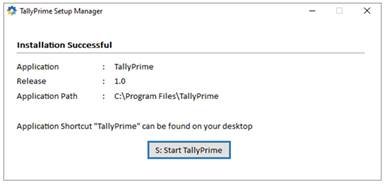
The application gets installed, and the following window opens.
2
5. Click Start TallyPrime to launch TallyPrime.
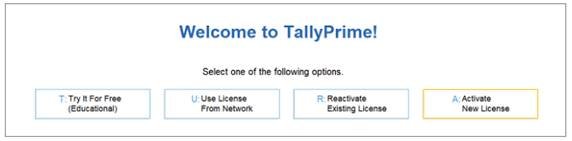
You can activate the license and start using TallyPrime.
3
After activating the license, you can create your first Company and start using TallyPrime for business transactions.
6. In case of Reactivating Existing License, Enter the Tally.NET ID and Password. Select the required TallyPrime license.

4
Once the license is configured to the Tally Gateway Server, you will receive the following message.
7. Select Yes to activate. Select the required Company to continue.

5
Your TallyPrime application is now licensed. You can start using TallyPrime for business transactions.
8. Open the required Company.
You will be prompted to do a migration.
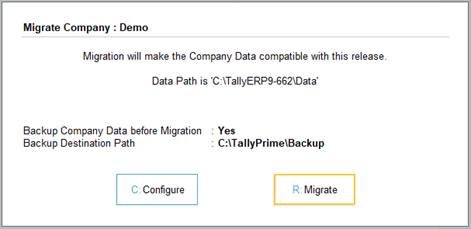
6
Click Migrate.
The Company will be migrated, and will remain open for you to continue.
(A) Migrate Company Data from Tally.ERP 9 to TallyPrime
TallyPrime comes with a reliable tool to migrate your existing company data and make it compatible. TallyPrime is a significant upgrade to your Tally experience, and therefore it is essential for you to convert your data.
TallyPrime will detect your data from earlier releases (Tally.ERP 9 to TallyPrime), and guide you in the migration process. All your transactions, along with your company features, masters, security settings, and so on, will be carried forward seamlessly.
1. Press Alt+F3 (Select Company) to open the List of Companies.
You can see the status Migration Required against the companies which are on a lower release.
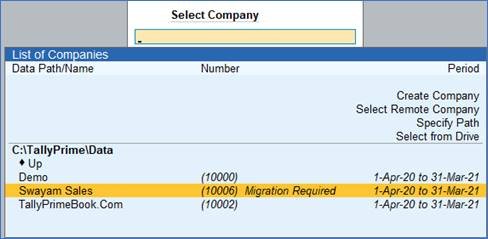
7
Alternatively, you can also migrate your data from by pressing …
F1 (Help) > Troubleshooting > Migrate.

8
Select the company that you want to migrate and press Enter. If the company has a username and password, you will be asked to enter the details.
Press R (Migrate) to continue. If you want to alter the backup path and data location before migrating, then press C (Configure).
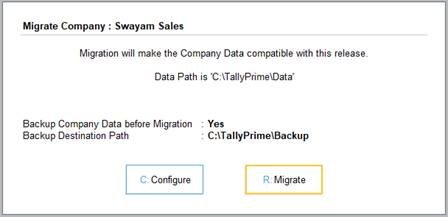
9
After migration is complete, your company data is ready to be used in TallyPrime.
If there are any issues in the company data, it is recommended that you repair the data before migrating.
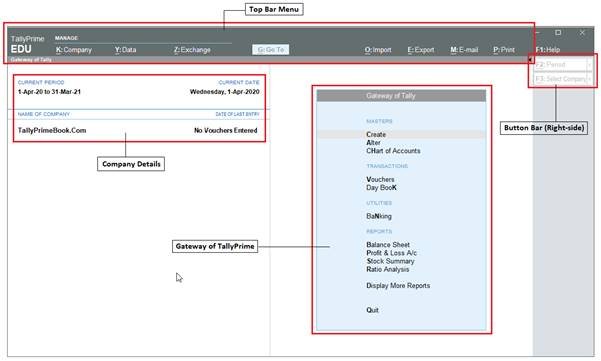
Home Screen :
When you open TallyPrime, you can see a home screen with different items –
- a top menu bar with pull down options,
- the details of the Companies that are open,
- the Gateway of Tally menu, and
- a button bar on the right-hand side of the screen.
10